Remember that warm fuzzy feeling you got when you caught your first fish on a new lure or new fishing style that you tried? Awesome excitement, wasn’t it? Imagine that same feeling but multiplied when you catch your first fish on your own homemade soft plastic. There is something totally special about catching a fish on your own lure instead of one bought from a store.
Many anglers never even realize that they can make their own soft plastics. There are many benefits–custom colors, scents, sizes–in addition to the obvious… SAVING MONEY! How many times have you set the hook using a soft plastic only to realize that you ripped a big hole in it where the hook was. Rip it off, put a new on one… rinse and repeat.
Instead of throwing these discarded ones away, save them and recycle them. As an added bonus, recycling them saves them from being tossed into our Lake and or the nearest landfill.
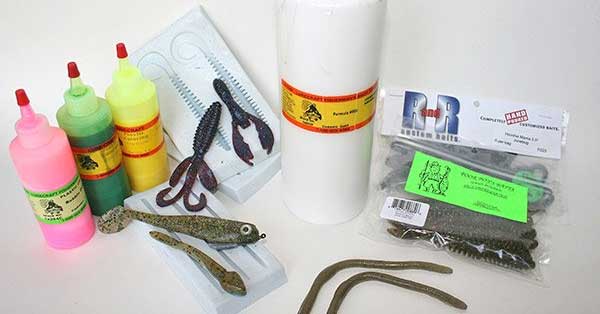
Materials
- Damaged or old soft plastics or vinyl plastisol
- Proper ventilation (e.g., fan)
- Proper eye protection and gloves
- Pyrex glass measuring cup
- Old microwave
- Plastic molds
PRO TIP: Beginner? Consider picking up a Make Your Own Soft Bait Fishing Lures KIT from Amazon.com
Step 1 – Prep
If you are planning to recycle old soft plastics, you’ll first want to separate them into groups. For example, keep your senkos grouped together and your Keitech swimbaits grouped together. Each plastic has different elasticity, salt content, scent, etc. and it is important to try and retain as much of that as you can.
If you instead choose to purchase raw material, you’ll want to pick up some vinyl plastisol. You can find this on Amazon for cheap. Be sure to pick up a brand that has excellent clarity (non-yellowing) and has low odor.
Step 2 – Melt and Customize
Place your old soft plastics in your pyrex container and throw them in your old microwave. Trust me, you DO NOT want to use your current household kitchen microwave for this. Your wife won’t be too pleased…
Set the timer for ~1 minute on high power–this will work for most small batches. You’ll likely need to use some trial and error to find the perfect sweet spot for your specific microwave setup. The consistency will start thick and thin out as it heats up. Keep going in 30 second intervals until you hit about 325 degrees F.
Add a few drops of your favorite color (or colors if you are feeling daring). Stir slowly as you add colors until you find something you are happy with.
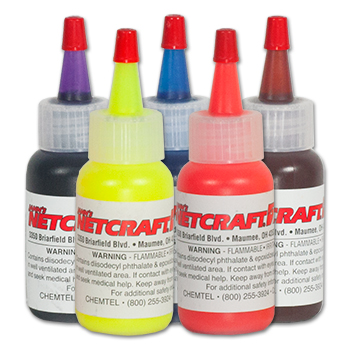
This is also the time you will want to add in any glitter or scents to the lure. If you are adding glitter/flake, be sure you use non-metal glitter to avoid starting a fire in the microwave!!
Stir the plastics carefully with a stick or spoon to help get rid of any bubbles that formed during the melting process. This will help ensure the pour results in a nice texture.
Step 3 – Pour
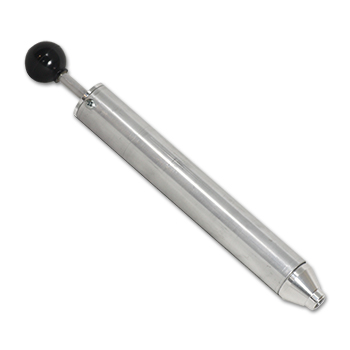
You can either pour freehand or use an injector mold. Be careful; the plastic is HOT and could cause serious injury. Pour slowly to help prevent bubbles from forming. Once you finish the pour, let the baits cool 10-15 minutes before attempting to remove them from the mold. You could even throw them in a bucket of ice water or cool water after a few minutes to help speed up the cooldown process. This will ensure the plastic fully sets and firms up.

The plastics will still feel tacky when you first take them out; this is normal. Be sure you trim off any excess plastic and clean up the edges. The best part… if you make any mistake, melt them down and try again! There is no risk in failing, only reward when you figure it out and catch your first big’gen.
If you’ve made your own plastics, be sure to share them with us on our social media outlets and tag #WallyBITES! Tight lines fishing freaks!!